Objective
TSN demo Software Release is an automation of TSN motor demo with SlapOS. The purpose of this post is to go step by step through the setup of this demo.
Wiring and network setup
Please follow the sections Hardware, PREEMPT_RT kernel and Network setup of the TSN motor demo .
Software Setup
SlapOS
To install SlapOS on both shuttle and Olimex boards one can follow the Installing SlapOS Node (Comp-123) tutorial .
Configure gpio
To allow SlapOS to do gpio configuration the addition of an udev rule is required as described in the Software Release's README .
You can update udev rules by running :
root@debian:~# /etc/init.d/udev restart
SlapOS Client
To supply TSN demo Software Release on the Shuttle and the Olimex boards a SlapOS Client is required. You can install one by following SlapOS HowTo Use SlapOS Client tutorial .
Supply and instanciate
To supply and instanciate the Software Release, you need identify the COMP-ID of the Shuttle and each Olimex board in your SlapOS Master.
If your shuttle supports hardware timestamping then it is recommanded to enable it through the parameter "hardware-timestamps" with the value "y".
Write the following script named tsn-script.py on the machine on which SlapOS Client is installed:
software_url="https://lab.nexedi.com/nexedi/slapos/raw/master/software/tsn-demo/software.cfg"
parameter_dict = {
        "hardware-timestamps":"y",
        "interface-list":"<interface-to-Olimex1> <interface-to-Olimex2>",
        "ip-list":"<Olimex1-ip> <Olimex2-ip>",
        "server-guid-list":"<COMP-ID-for-Olimex1> <COMP-ID-for-Olimex2>",
}
title="tsn-demo-node"
supply(software_url, "<COMP-ID-for-Shuttle>")
supply(software_url, "<COMP-ID-for-Olimex1>")
supply(software_url, "<COMP-ID-for-Olimex2>")
inst = request(software_url, title, filter_kw={"computer_guid":"<COMP-ID-for-Shuttle>"}, software_type='RootSoftwareInstance',
               partition_parameter_kw=parameter_dict)
print(inst.getConnectionParameterDict())
and run it :
root@red:~# slapos console tsn-script.py
On each computer you can follow the compilation through /opt/slapos/log/slapos-node-software.log . You can get more informations in HowTo Deploy A Software On Theia Runner keeping in mind paths are different because we are on a local machine and not a Theia.
Run the demo
Once instanciation is finished you will find in your SlapOS Master the links of the generated scripts in the Connection Parameters of a service called "tsn-demo-node" or whatever name you gave as a title in the script executed with slapos console command.
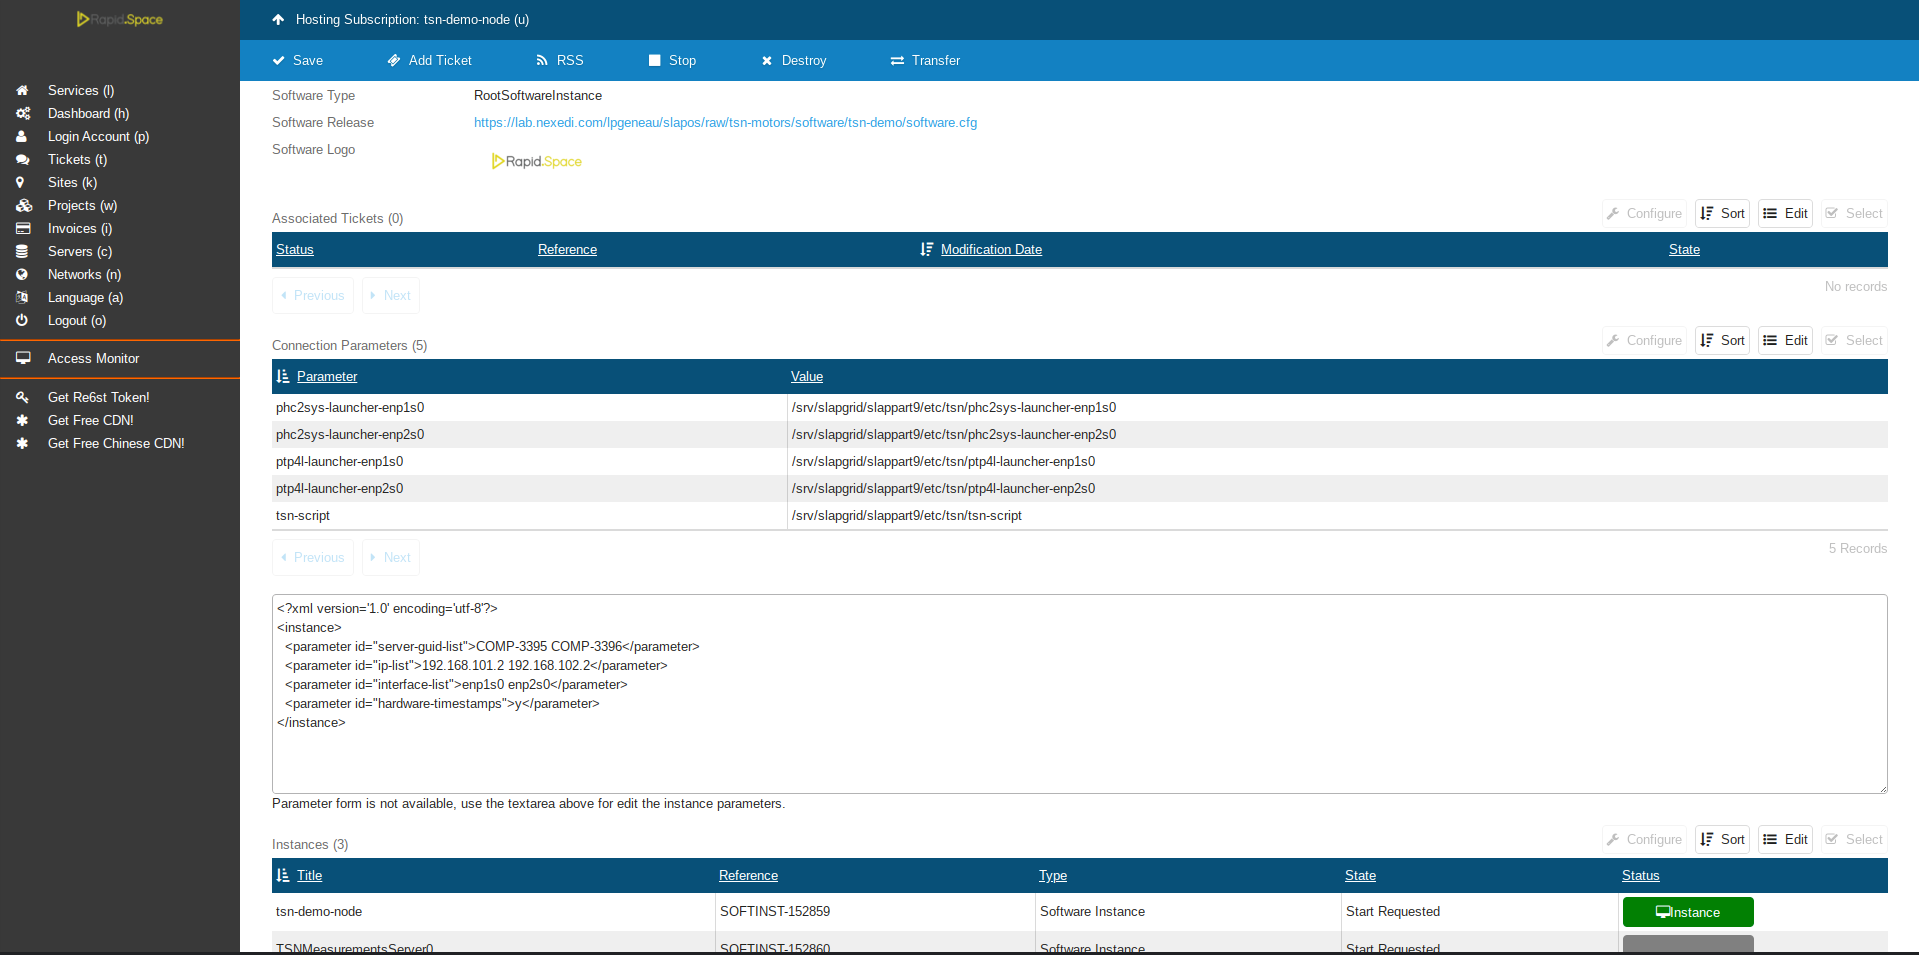
These are the scripts for the Shuttle. In the Instances of the same service you will find TSNMeasurementsServer0 and TSNMeasurementsServer1 will are respectively the software supplied on Olimex1 and Olimex2.
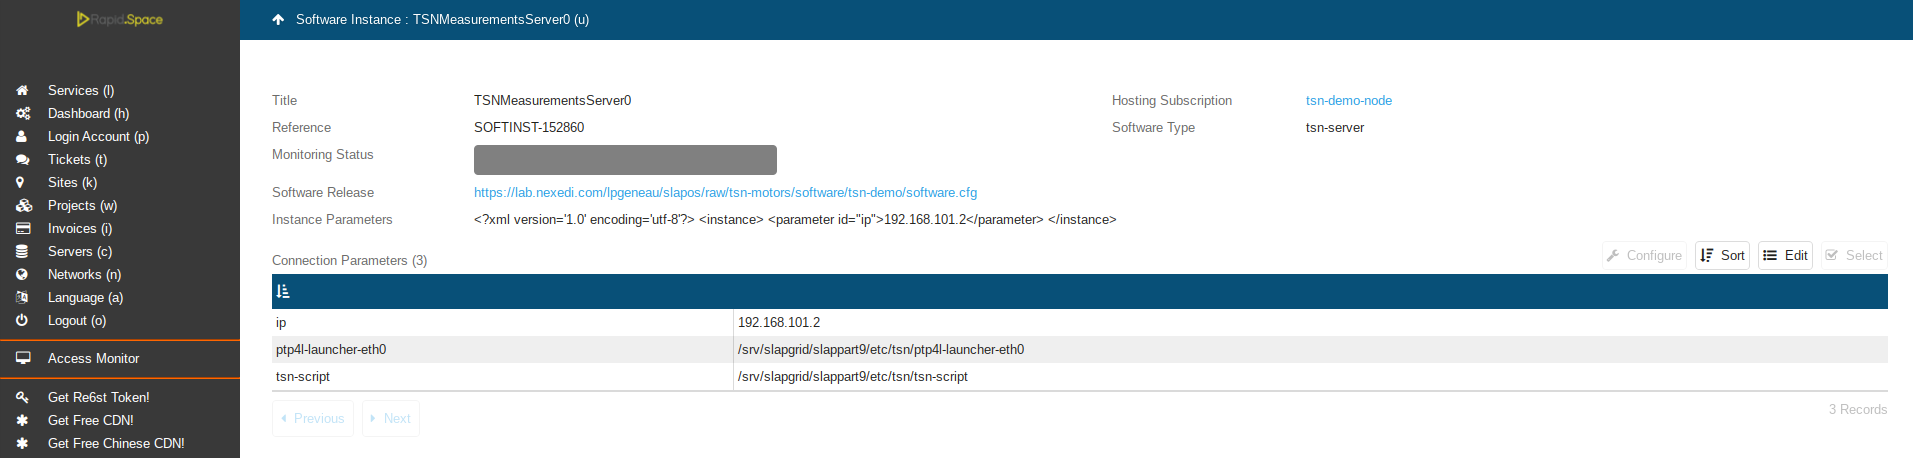
Each will provide the scripts generated on the related Olimex board.
Synchronisation
As mentionned here you will probably have to disable NTP. Even if timedatectl | grep NTP returns NTP service: inactive, also check systemctl status ntp. If the service is running, you can run:
root@red:~# systemctl stop ntp
If you do not want ntp to be started at boot time :
root@red:~# systemctl disable ntp
On the Shuttle
root@red:~# <path-to-ptp4l-launcher-for-interface-to-Olimex1> &> ~/ptp4l_interface0.log &
If you are using hardware timestamping :
root@red:~# <path-to-phc2sys-launcher-for-interface-to-Olimex1> &> ~/phc2sys_interface0.log &
You can read more about it in this documentation .
On Olimex 1
root@debian:~# <path-to-ptp4l-launcher-eth0> &> ~/ptp4l_eth0.log &
On the Shuttle
root@red:~# <path-to-ptp4l-launcher-for-interface-to-Olimex2> &> ~/ptp4l_interface1.log &
If you are using hardware timestamping :
root@red:~# <path-to-phc2sys-launcher-for-interface-to-Olimex2> &> ~/phc2sys_interface1.log &
On Olimex 2
root@debian:~# <path-to-ptp4l-launcher-eth0> &> ~/ptp4l_eth0.log &
Run the demo
Once Olimex boards are synchronised (ptp4l logs show an offset under 40000 ns) you can run <path-to-tsn-script> first on the Olimex boards and then on the Shuttle.